
INPUT DEVICES
GOALS FOR THE WEEK
- Probe an input device(s)'s analog and digital signals
- Document your work to the group work page and reflect on your individual page what you learned
- Measure something: add a sensor to a microcontroller board that you have designed and read it.
GROUP
INDIVIDUAL
Link to the group assignment: TEST
CAPACITIVE TOUCH SENSORS
TEST 1
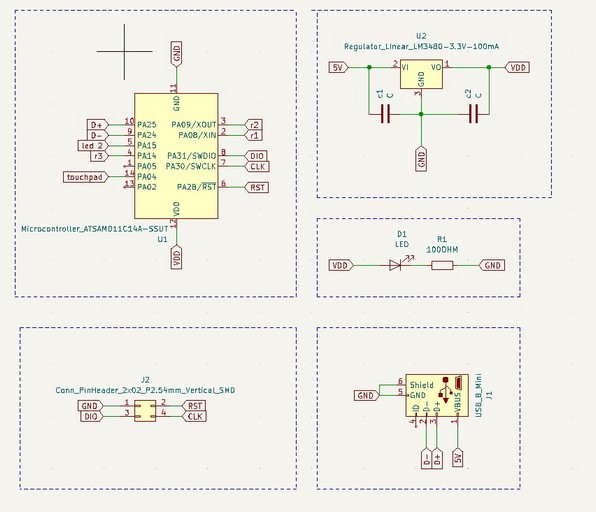
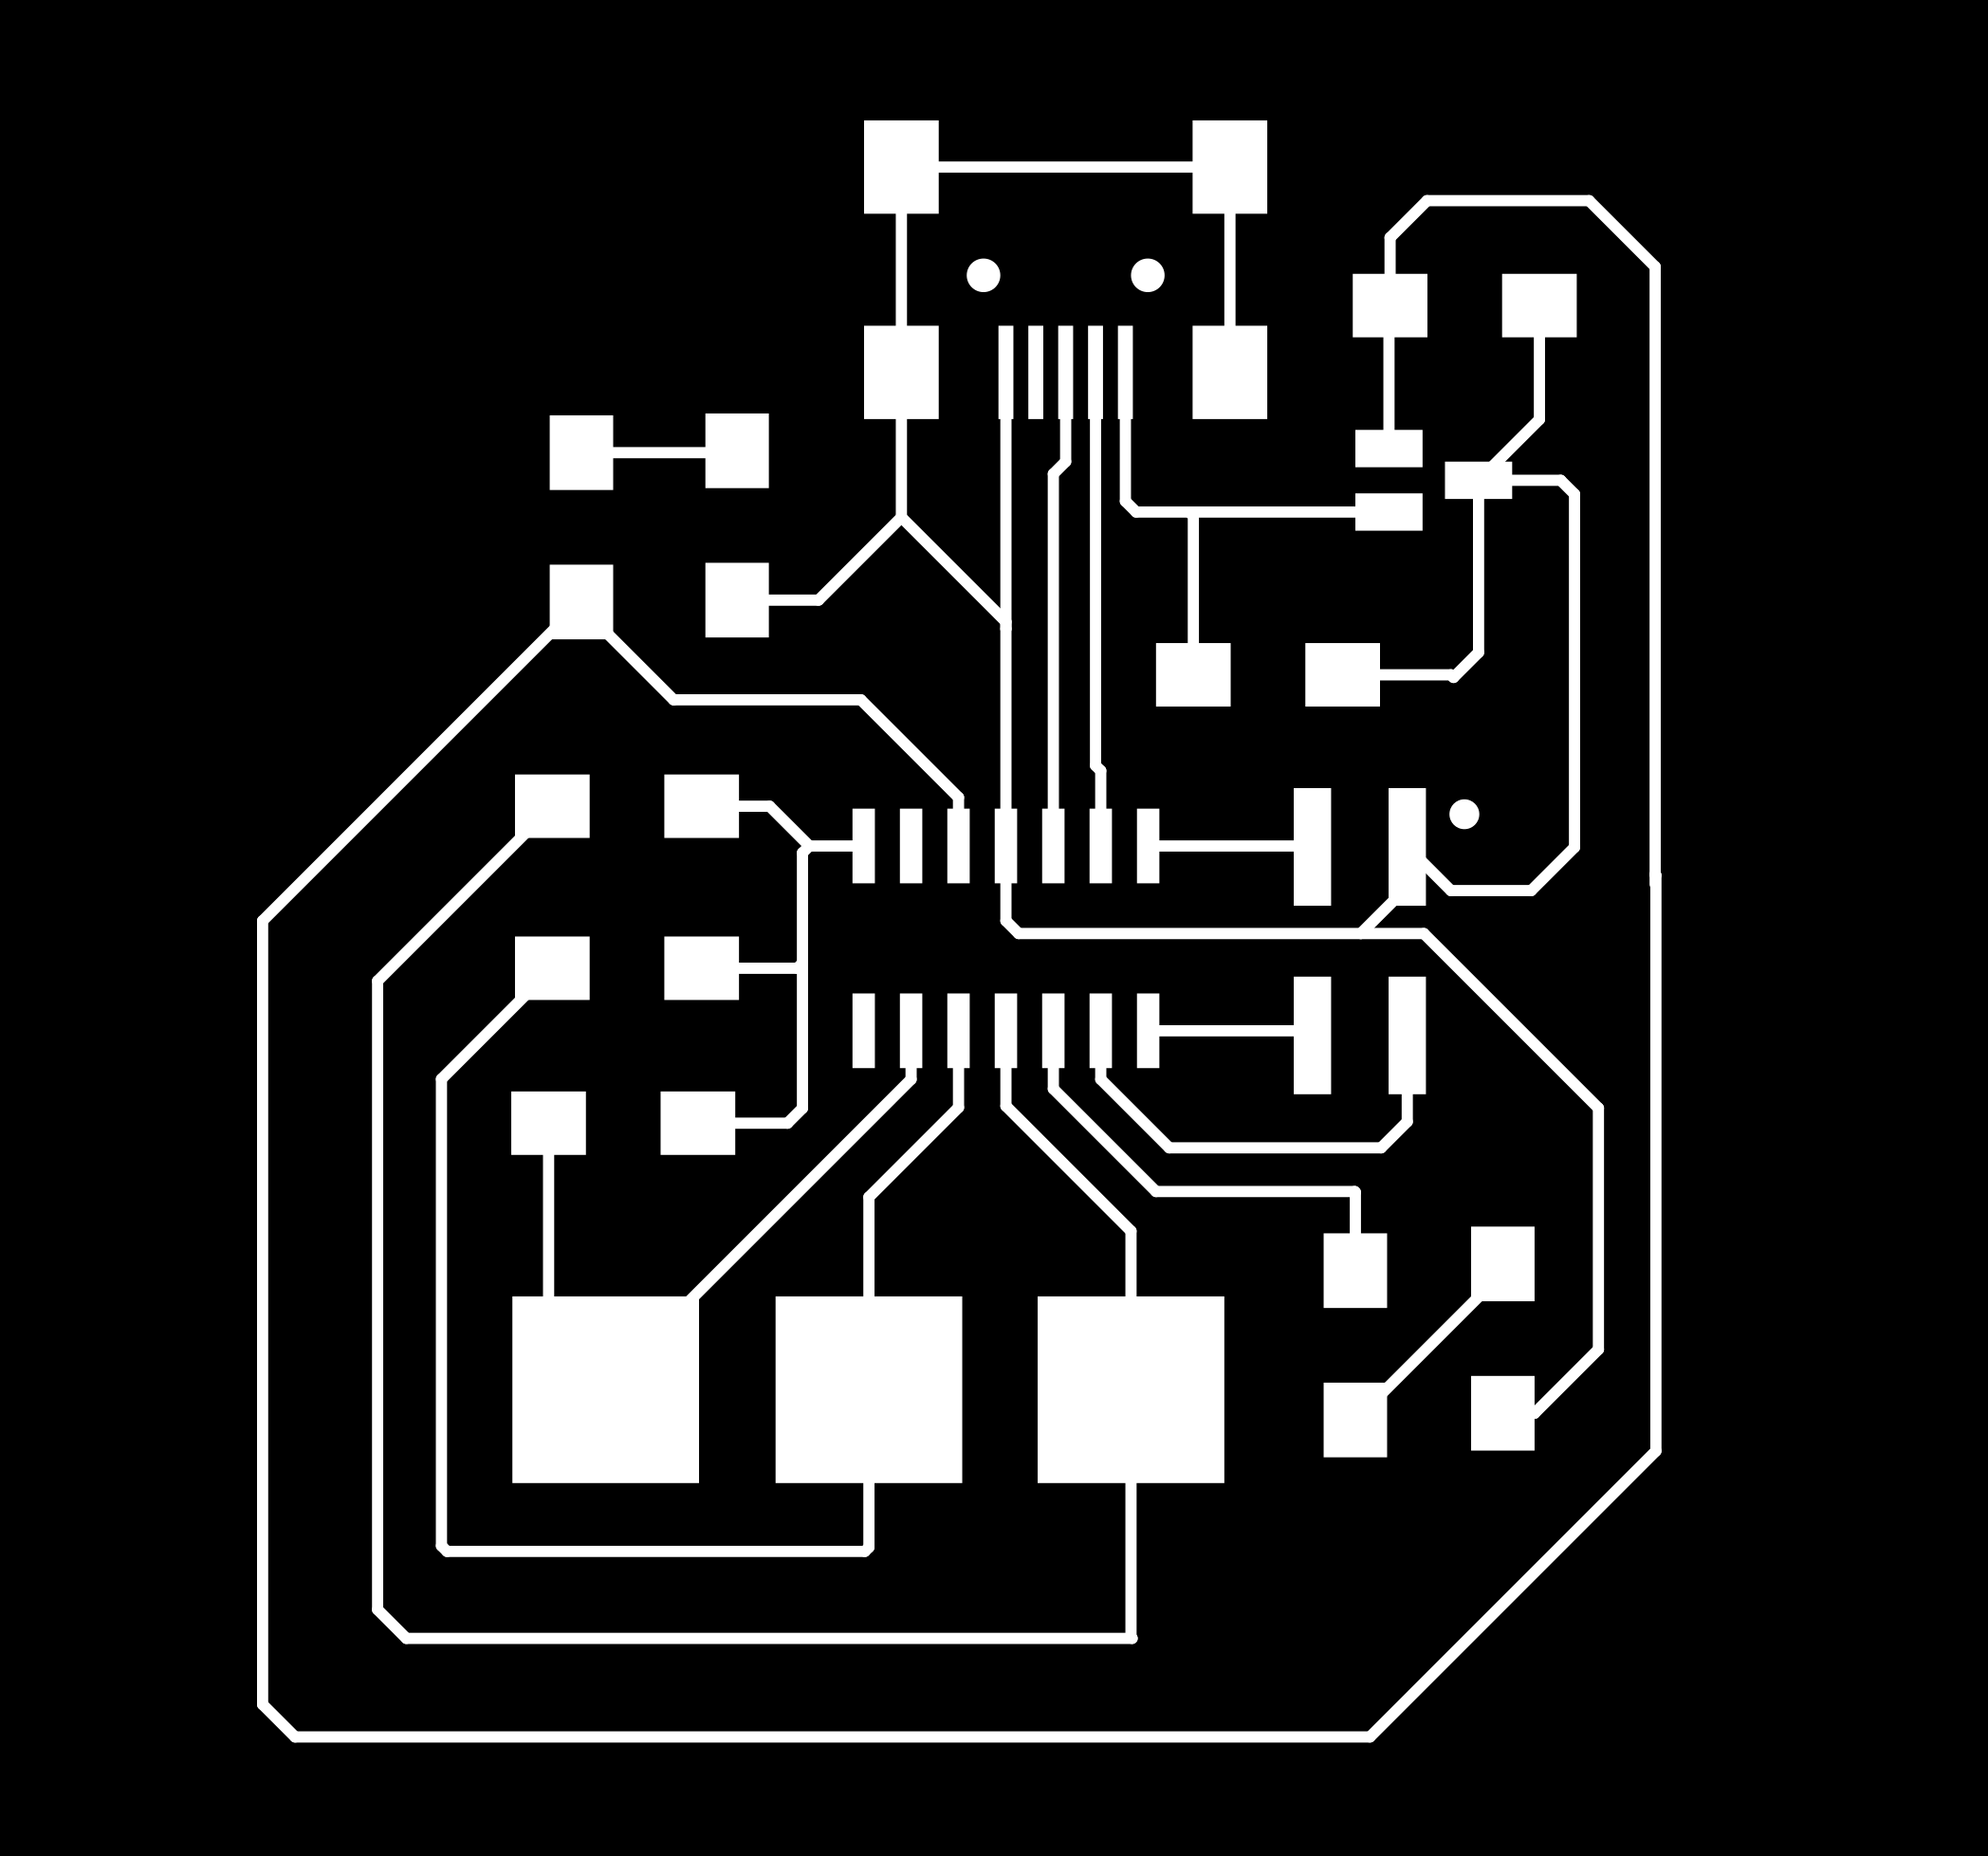
I decided to make 3 pads as sensors added into the PCB and use the capacitive sensing library for SAMD micro controllers.
SCHEMATIC
PCB

Programming
I installed the Capacitive sensing library in Arduino and ran a sample code and got the following error,
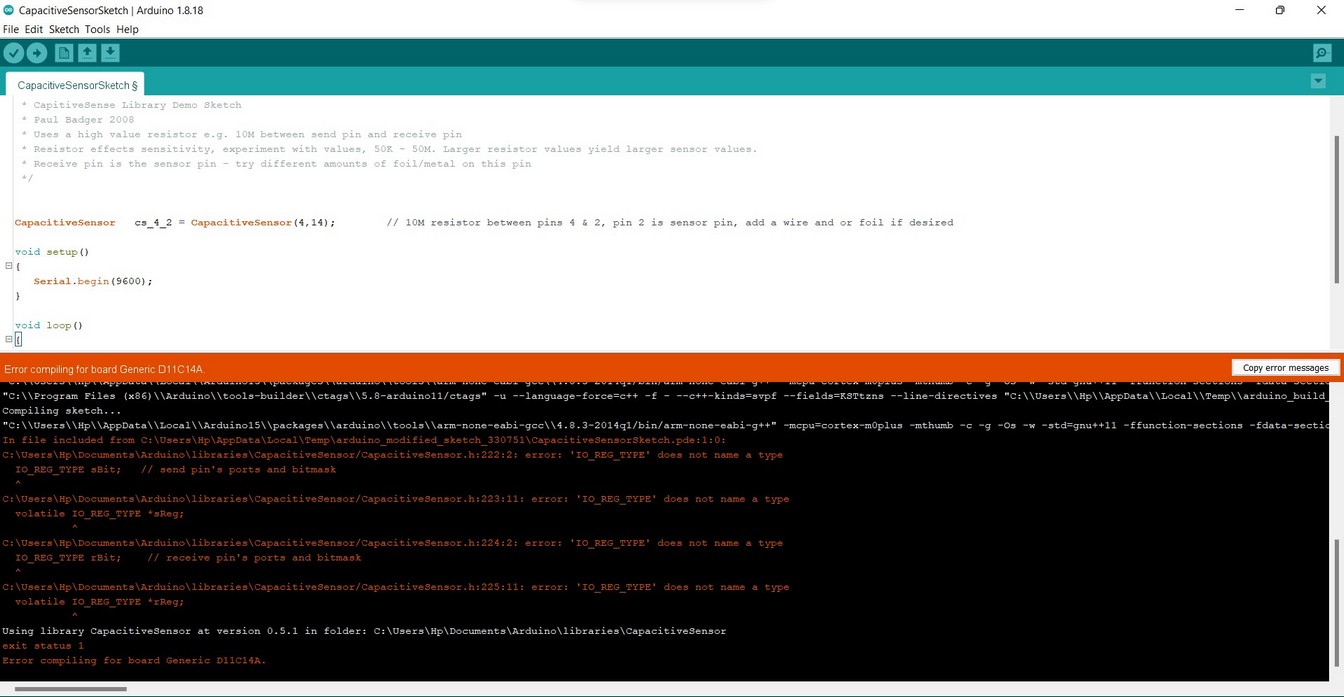
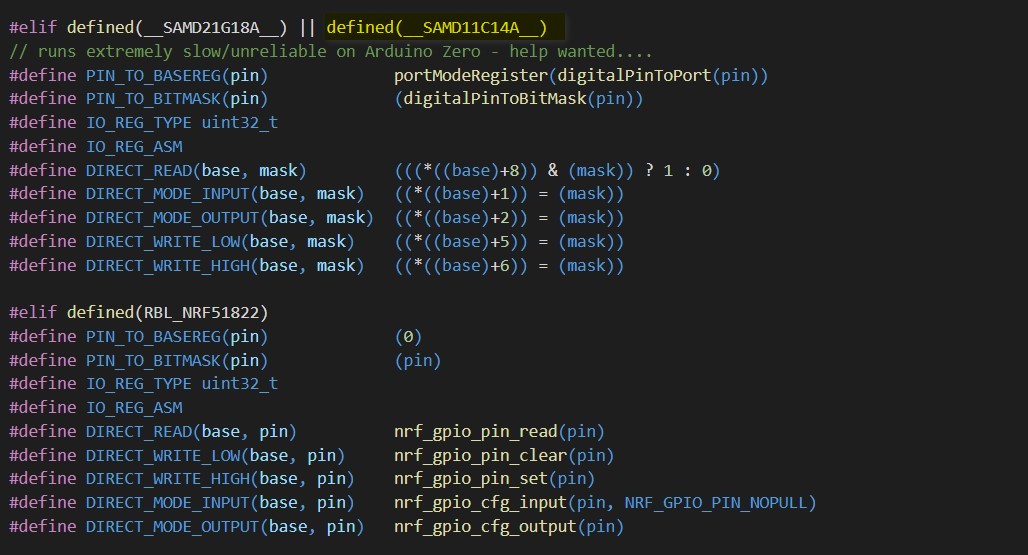
The capacitive sensing library is not configured for SAMD11C micro controllers, so I had edit the library file.
THE CODE

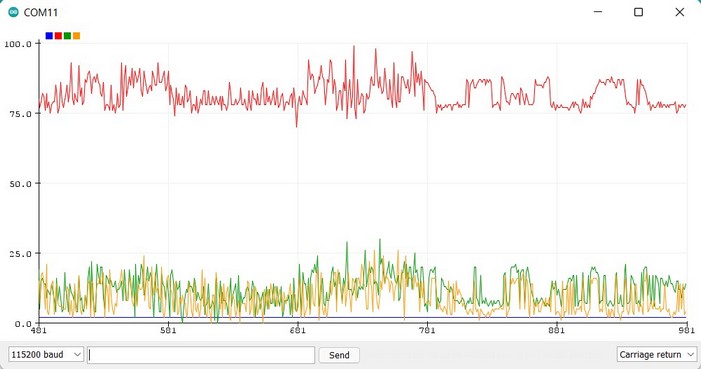
SERIAL MONITOR
TEST 2 FOR THE FINAL PROJECT
For my final project, I wanted to make a capacitive sensing touchpad as a medium of interactive with a couple of motors. I added LED's instead of motors for testing.
SCHEMATIC
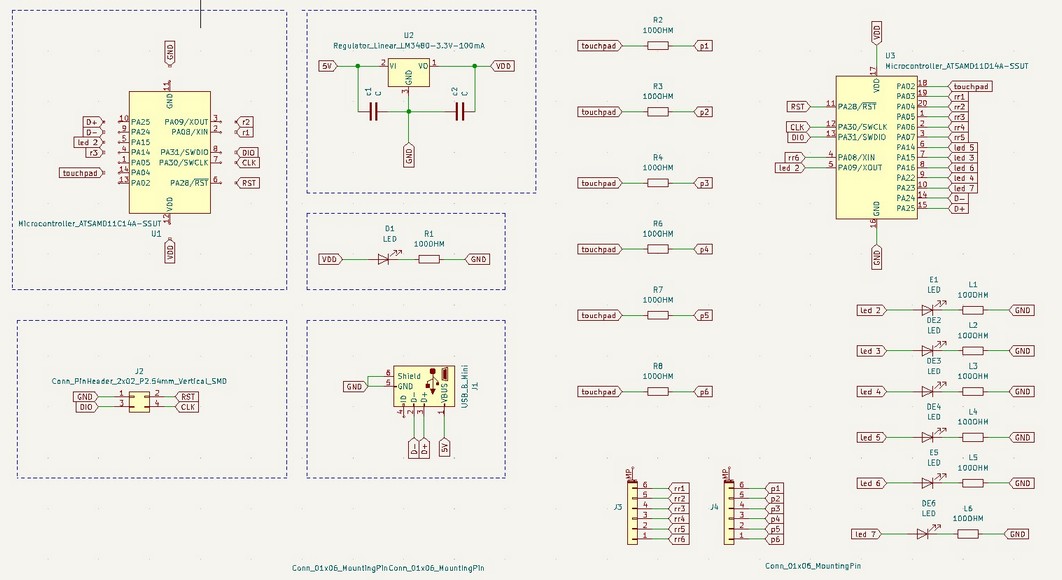
PCB


MODIFYING THE LIBRARY
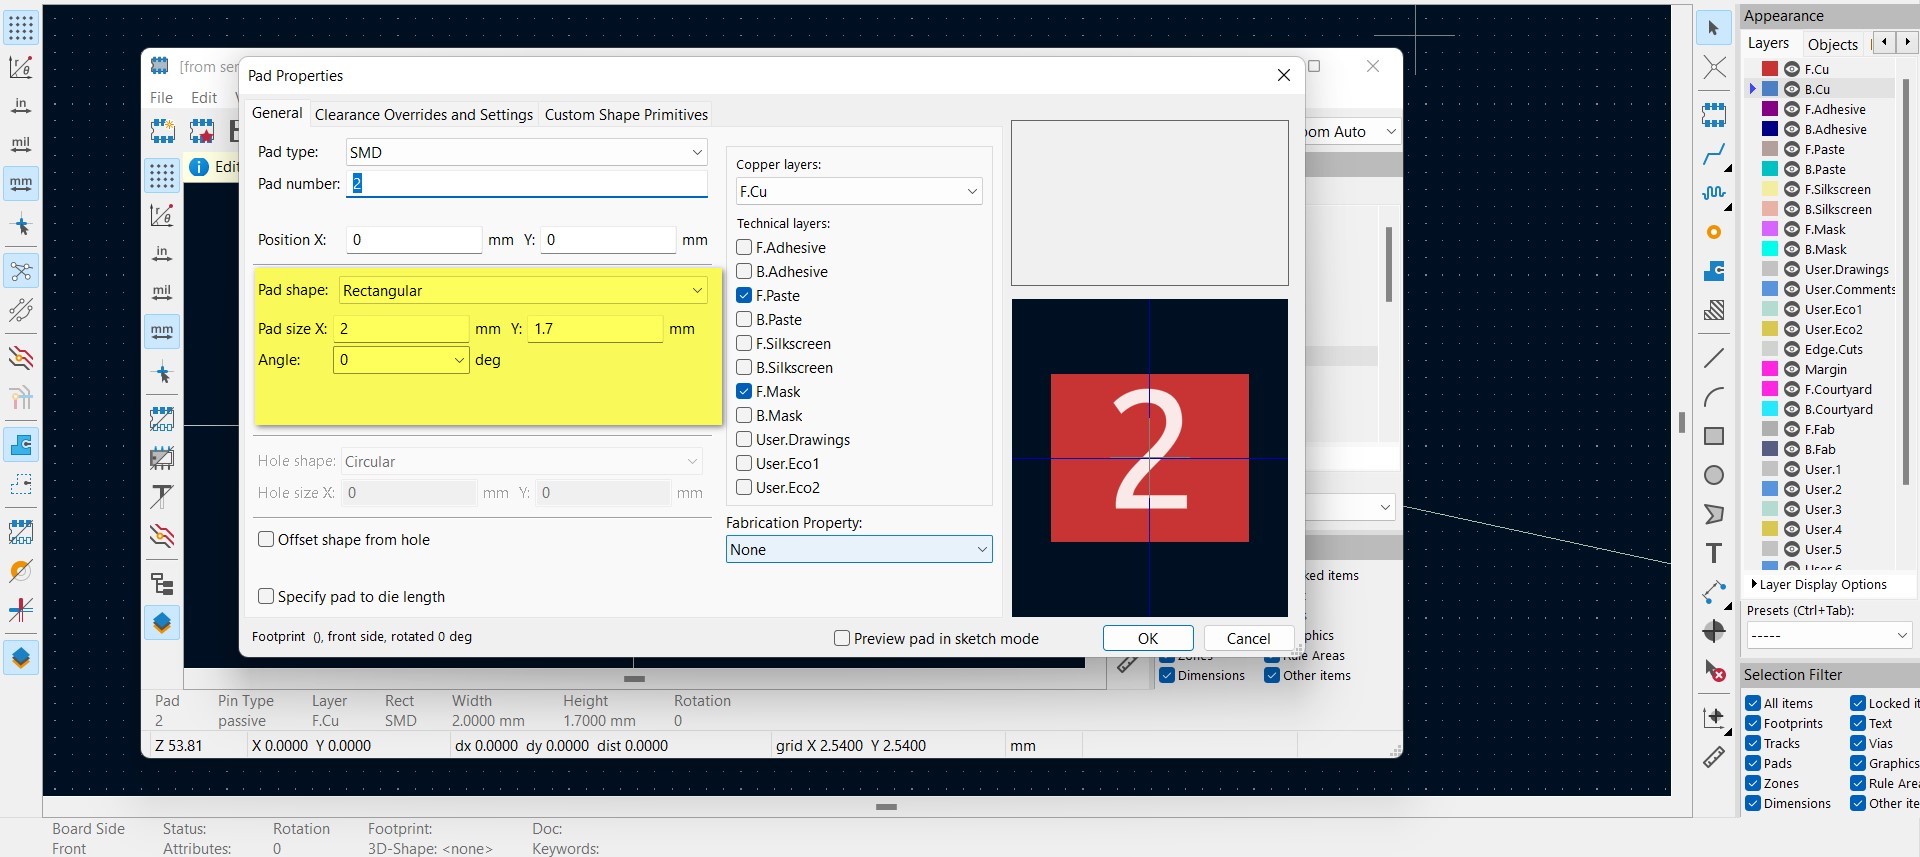
- To make the circular pads,
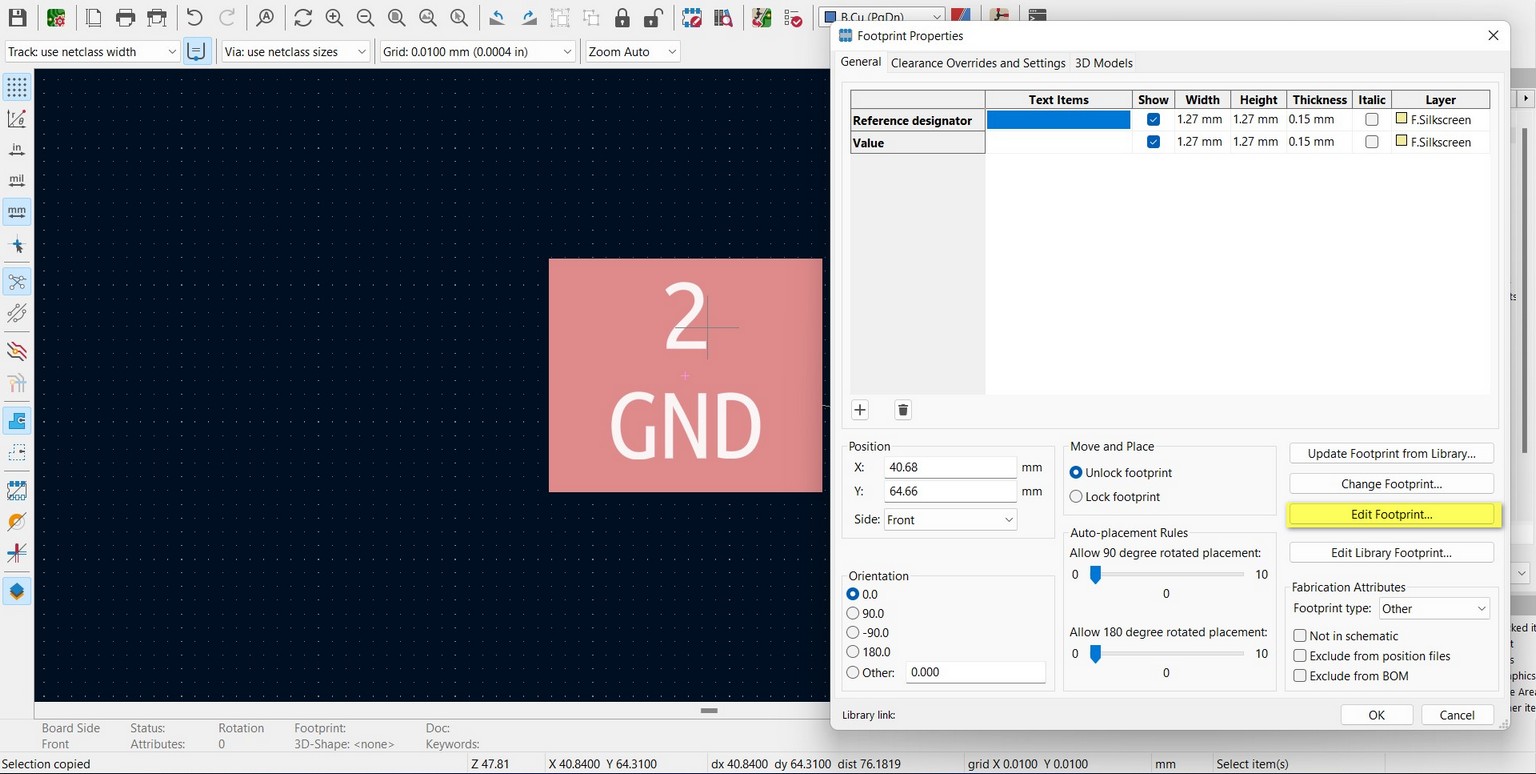
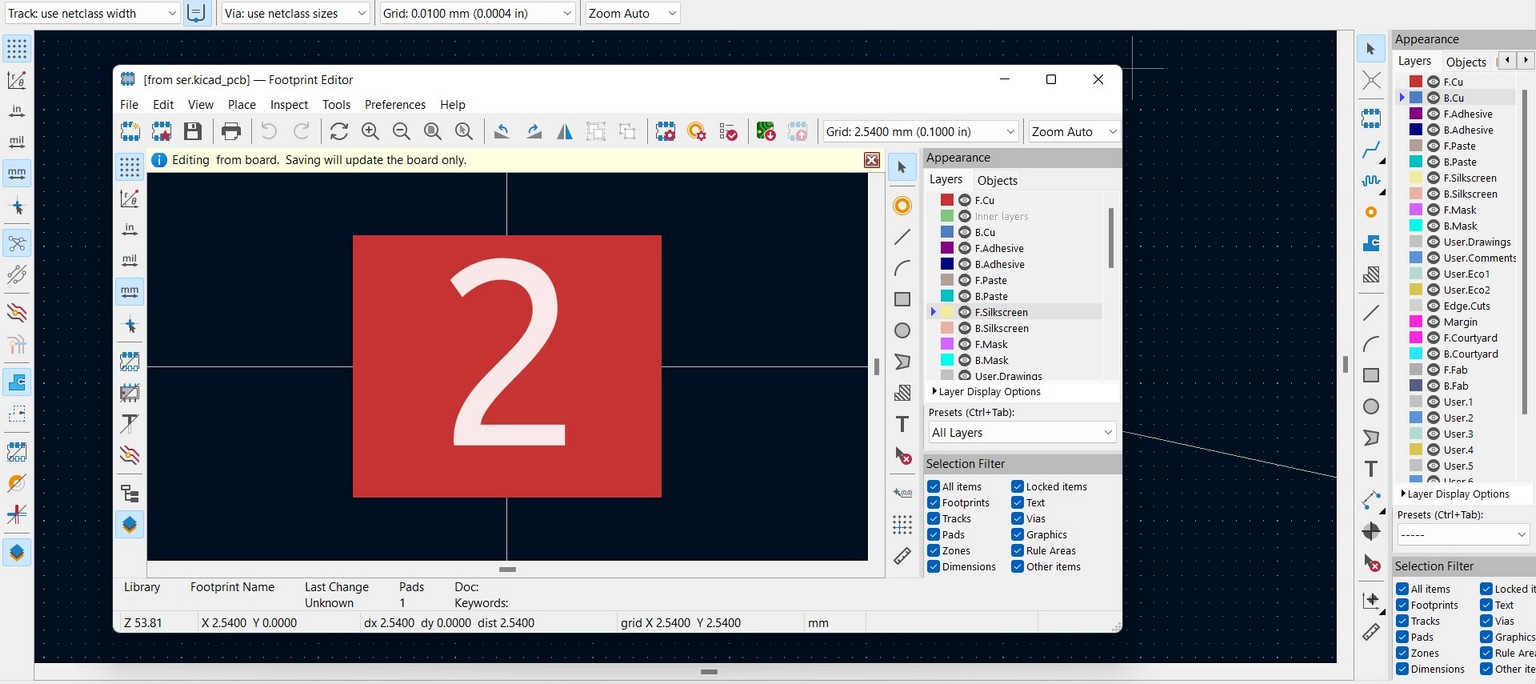
- Start with any standard footprint, select and click on Properties (or press E).
- Click on Edit footprint.
- Right click -- Poperties or Press E.
- Here, you can change the shape of the footprint and the dimensions as well.
FLASHING
As I used the bigger SAMD11C21 Micro controller for the test, I had to download a different binary file for flashing.
PROGRAMMING
Design files download
Kicad for TEST 1
Kicad for TEST 2
Arduino Code for TEST 1
Arduino Code for TEST 2